
Photo credit: @unarchived_images
Installing Dirty Life Beadlocks on the Suzuki Jimny JB74
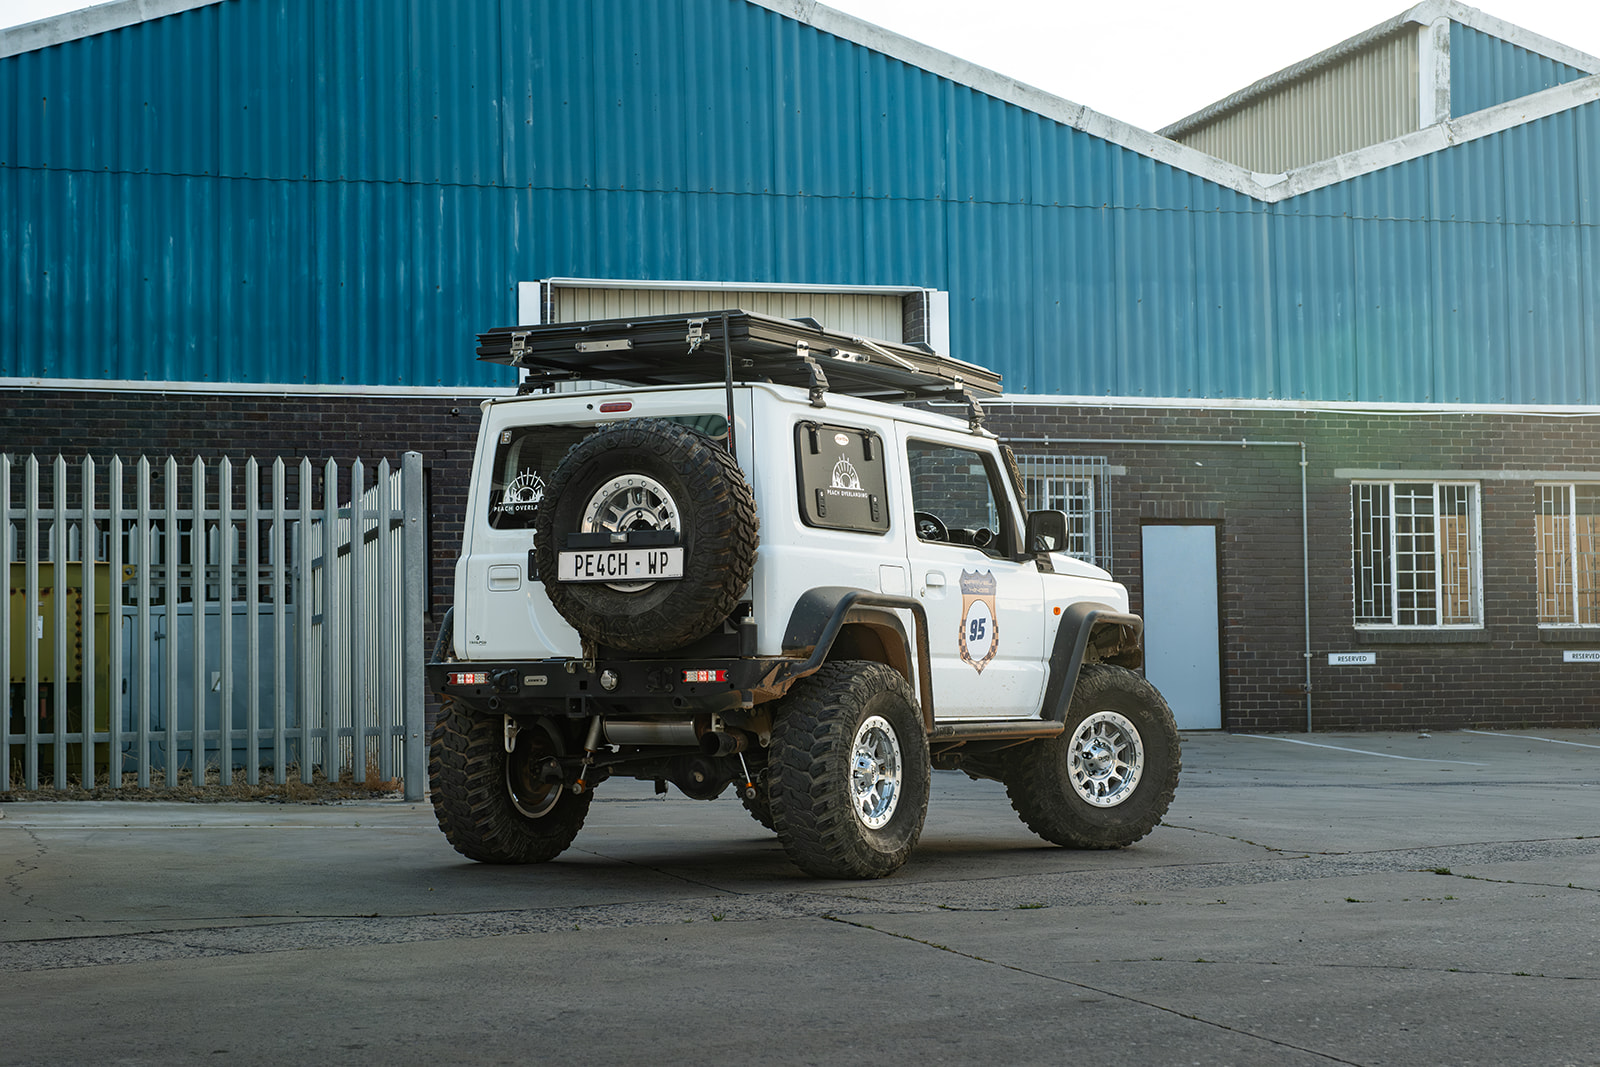
When it comes to building a capable off-road Suzuki Jimny, the right wheel setup makes all the difference. In this guide, I’ll take you through how we installed and set up Dirty Life Beadlocks on Peach — my 2020 Suzuki Jimny JB74. These beadlocks not only look incredible but have completely changed the Jimny’s off-road performance.
Why Choose Beadlocks for Your Jimny?
Beadlock wheels clamp the tyre bead between two metal surfaces, preventing it from slipping off the rim when running low air pressures. For a lightweight 4×4 like the Jimny, beadlocks allow you to air down safely for improved traction, control, and tyre performance on sand, rocks, or mud.
They’re ideal for overlanding setups, rock crawlers, and anyone running larger tyres who wants peace of mind when tackling technical terrain.
Tools & Prep Before Installation
- Torque wrench (set to 32 Nm for M6 bolts)
- Anti-seize or light grease for bolts
- Tyre lube or bead grease
- Valve core remover
- Compressor or tyre inflator
- Patience — each wheel has 20 bolts!
We had the tyres unmounted professionally, then assembled the beadlock rings ourselves — a slow but rewarding process that ensures everything seats perfectly.
Step-by-Step Beadlock Installation
1. Seat the Tyre Correctly
Place the tyre on the inner lip of the rim. Apply a light layer of bead grease to help it sit evenly. Align the beadlock ring on top and thread each bolt by hand to avoid cross-threading.
2. Tighten in a Star Pattern
Tighten bolts gradually in a star or cross pattern to ensure even clamping pressure. Follow this torque sequence:
| Torque Stage | Torque Value |
|---|---|
| Initial pass | 10 Nm |
| Second pass | 20 Nm |
| Final pass | 32 Nm |
Once all bolts are evenly torqued, inspect the ring for gaps or uneven surfaces. If your beadlock wheels use aluminium threads, avoid over-tightening — stripped threads can be repaired with helicoils if needed.
3. Inflate and Leak Test
Inflate to 1.8/2 bar and spray soapy water around the bead area to check for leaks. If everything seals properly, let the tyres settle overnight before balancing or driving.
Performance on the Trail
Once fitted, the difference was immediate. Running at 0.6/0.8 bar off-road gives incredible traction — the tyres flex nicely over obstacles, and the Jimny feels planted and confident.
Despite common concerns, the Dirty Life Beadlocks balanced easily using standard wheel weights. On-road handling remains smooth with no excessive vibration, even at highway speeds.
Maintenance Tips
- Recheck torque after 100–200 km and periodically thereafter.
- Clean the ring area after muddy trails to prevent corrosion or buildup.
- Inspect washers and bolts for wear before each trip.
- Use wheel spacers if necessary for brake caliper clearance — especially if running a rear disc brake conversion.
Final Thoughts
Fitting beadlocks isn’t just about aesthetics — it’s a true performance upgrade. The Dirty Life Beadlocks add strength, safety, and style, giving your Jimny the grip and confidence it deserves on technical trails.
For anyone serious about off-roading or overlanding, they’re one of the best wheel investments you can make.
Next up: I’ll share how they’ve held up over a few thousand kilometres of mixed driving and how I maintain them between trail runs. Stay tuned on the Peach Overlanding Blog for more Jimny upgrades and real-world reviews.
Recent Posts
 RATEL Long Range Fuel Tank Review – First Trip Impressions on My Jimny
RATEL Long Range Fuel Tank Review – First Trip Impressions on My Jimny
 Upgrading to the Gobi-X Rear Bumper for Your Suzuki Jimny
Upgrading to the Gobi-X Rear Bumper for Your Suzuki Jimny
 Runva 4500lbs Winch Setup for My Jimny JB74
Runva 4500lbs Winch Setup for My Jimny JB74
 Introducing the Peach Overlanding Online Store